Showing posts with label Bolt Action. Show all posts

Friday, 29 October 2021

A Bolt Action Campaign, part 3: counterattack at Mill

During the last battle of our campaign, the Germans succesfully assaulted the Peel Raam stelling. Now for the first time the dutch would go onto the offensive, by counterattacking the recently conquered defense line at Mill in the morning of the 11th of may. Historically the attack consisted out of an amalgamation of various availlable units. 

We played a modified Point Defence scenario, with the three Pill boxes being the dutch objectives. Although we had both suffered casualties in the previous scenario's we could replenish most casualties and deploy full units. Because he wanted to take advantage of the availlable cover Michael deployed his forces relatively far forward  along the trenches. As usual we used our hidden markers for units that had not yet been spotted (Germans blue, dutch red). 
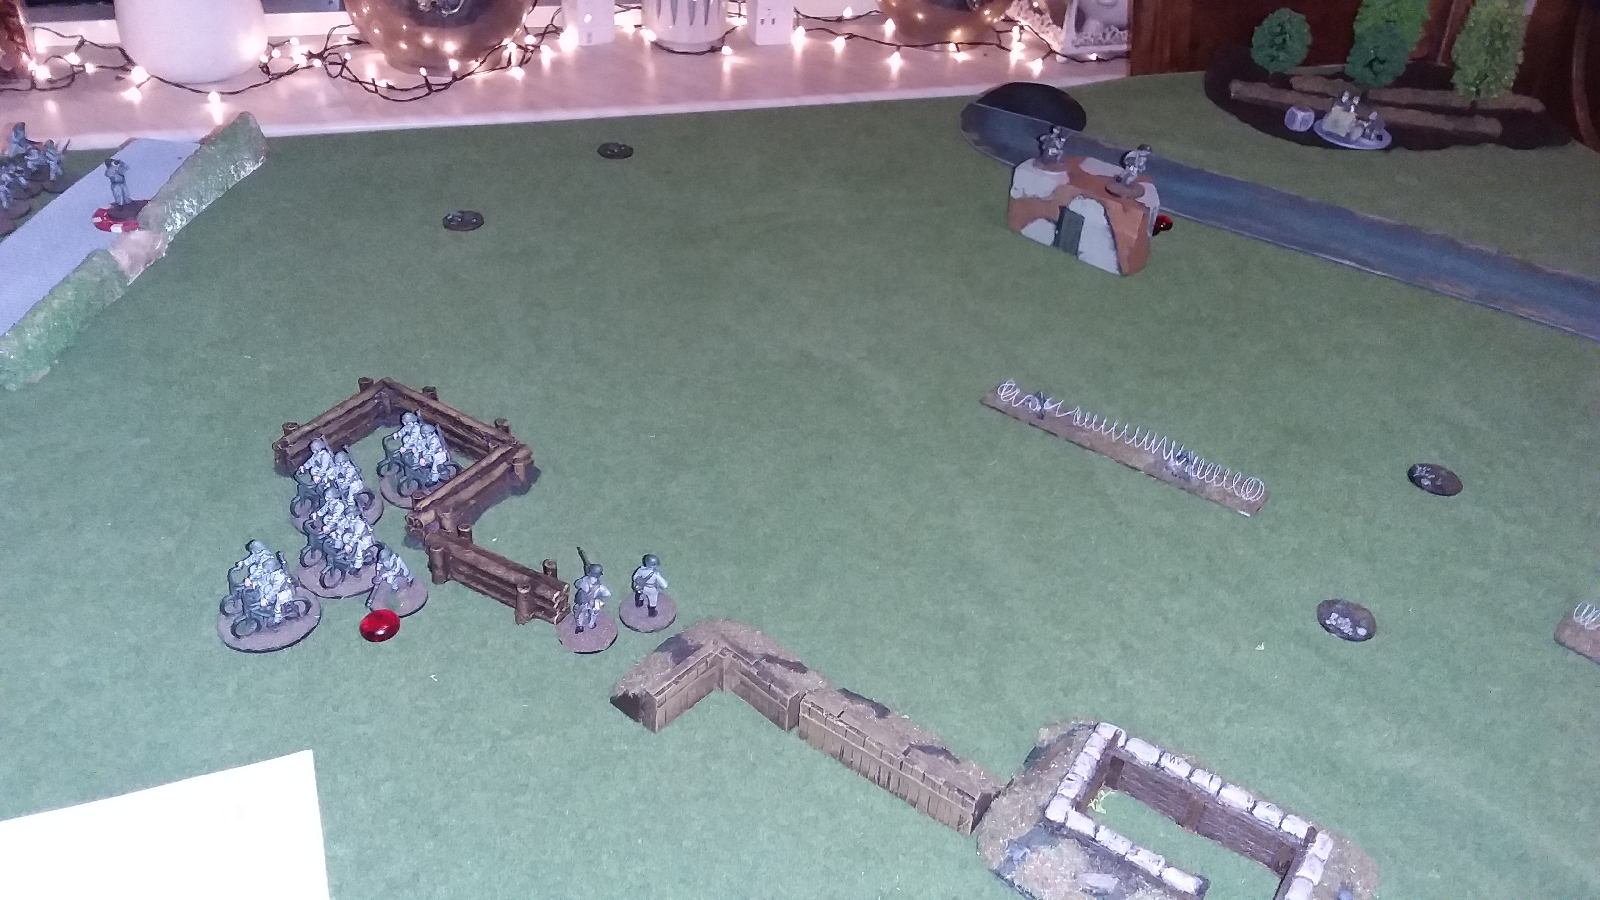
The first turn saw the dutch fire suppprt move up to the treeline allong the road, ready to fire at the defending germans. A platoon of two squads and a lieutenant were send to outflank, and the huzaren advanced on the left flank. Casualties were relatively light.
  The second turn started with a full on assault of the most forward german positions, and even though the german defensive fire caused some casualties the dutch infantry managed to redeem themselves and won the close combat. The germans redeployed some veteran infantry in the centre of their line to cover the retreating german right flank.
On the third turn the dutch left flank bravely advanced, but the german infantry and pioneers counter attacked, causing severe casualties on both sides. A squad of wielrijders reinforced the dutch left flank. On the dutch right flank the German defenders kept their heads down, avoiding the worst of the dutch direct artillery fire. 
The fourth turn started with a massive dutch artillery barrage smokescreen coming down in front of the pillbox on the german left flank. Under cover off the smoke, the dutch outflanking sectie(platoon) made a dash for the pillbox. This forced the german defenders to reveal themselves, trying to ambush the advancing dutch. In return they exposed themselves to the dutch firing line. 

In the mean time the dutch assault on the left flank reached the first german pillbox, which was quickly captured (due to a lack of firing slits on the rear, the germans had chosen to not occupy the pillbox, but to deploy their defenders behind them as cover).
The situation was not looking well for the germans, and since this was a campaign and not a one off, Michael wisely decided that it was better to save as many of his forces as possible, than to risk them all for the slim chance of getting a draw. The Dutch, having the second pillbox within reach, focused all their effort on it, and only consolidated their already succesfull left flank.
The battle ended with the dutch in firm control of two pillboxes, gaining the first Dutch victory of the campaign. The german choice for a forward defence turned out to be a costly mistake. Only a few of the german casualties would be replaced, and the loss of the light howitzer was costly. 


Just like history the dutch counterattack was succesfull due to a combination of bravado and a coincidental simultanious attack by two units. Unknown to the brave Dutch forces the rest of the Peel-Raamstelling had already been abandoned, so during the night the Dutch left their reconquered positions and retreated to the next defence line: the Zuid Willemsvaart.

Friday, 6 August 2021

A Bolt Action campaign: may 1940, invasion of the Netherlands

After months of planning and a sneaky pandemic my friend Michael and myself finally started our Bolt Action campaign this week. We are using the campaign rules as published by warlord Games, with a few houserules to make them slightly less convoluted.

We plan to fight 6 consecutive games, representing the advance of german forces through the south of the Netherlands in may 1940. We plan to modify existing scenario's from various books to suit our games. The following battles will be played:

Raid of the Heumen lock-complex (may 10th, Maas-Waal channel defence line)
Assault of the Peel-Raamstelling at Mill (may 10th)
Counterattack at Mill (may 10th)
Hasty Defence of the Willemsvaart (may 11th)
Retreat through Brabant (may 12th)
Attack on Dordrecht (May 13th)

The campaign rules allow each player to assemble a company size masterlist with support units, from which you select units for each battle. Casualties suffered need to be replaced after each battle with reinforcement points earned. Surviving units can gain experience.

To introduce a Fog of War in bolt action, we used counters to represent units deployed, which would only be replaced with their corresponding units when they fired, or moved out of cover into line of sight. Counters can be targeted by fire, but only suffer pin markers.

Raid of the Heumen lock-complex
Early in the night german infiltrators dressed as railroadworkers and military policemen tried to seize various bridges across the Maas-Waal kanaal. In some cases they were uncovered by the border battalioans guarding these bridges, or the bridge was blown with infiltrators on top off it. At Heumen some 30 german soldiers managed to get across the bridge at a lock compex, before revealing themselves and assaulting the defenders. They managed to hold out untill reinforcements arrived, thwarting various dutch attempts to retake the bridge and destroy it.

We started the scenario with two forces of 750 points. The germans (RED) could deploy up to 3 infantry squads and an officer on the dutch side of the bridge, within 12" of it. Other units had to start on the far side of the canal, which can only be crossed by infantry at the lock doors and the bridge. The Dutch start occupying the three bunkers and the breastworks present.

Objective of the germans is to take out at least two of the dutch bunkers covering the bridge, while the Dutch need to recapture either the bridge or the small wooden guardhouse next to it, in order to blow the bridge.
The first turn the Germans seized the initiative and surged a unit forward towards the bunker near the road. Dutch units fired upon the german infantry advancing towards the bunker, but came under intense artillery and mortar fire in return. On the left flank the units occupying the bunkers went into ambush, ready to counter any german attempt to cross the canal.

The second turn saw the germans seizing the first bunker in close combat. Accurate mortar fire hit the dutch unit covering the bunker. Dutch artillery fire form the ancient 8 staal covering the road failed to hit, but did convince the german officer to redeploy his infantry from the guard house in a safer position behind a nearby hedge, now that the first bunker was in their hands. A squad of german infantry took their chances and charged across the bridge to reinforce the units near the guard house.


The third turn saw two dutch infantry squads reveiling themselves and work their way up the side of the road towards the guard house. Aided by a Fubar on the german infantry that just crossed the road they bravely advanced. Elsewhere some shots were exchanged and some unrevealed units redeployed towards the tableside where the action took place.

On the fourth turn the dutch advanced further, coming within charge range of the empty guardhouse. The 8-staal in ambush still threatened the german units, so they sat tight and took some pinning shots at the advancing Dutch infantry. At the end of the turn the luftwaffe liaison called in a Stuka, which duly arrived and pinned a lot of dutch units and blasted apart one of the advancing infantry squads.

In the mean time a dutch unit of regular Politietroepen had arrived from reserve, took some potshots at the german occupying the nearby pillbox and at the start of the next turn charged in. They managed to retake the bunker with only minimal losses. As a reaction to this manouvre the germans advanced their veteran Infiltrators back towards the guardhouse and reoccupied it. The two units of dutch inexperienced troops near that same guardhouse remained pinned down, taking further casualties.

The last turns saw some scattered shots taken at various units, eliminating both the german and dutch light artillery. The dutch defenders on ambush detered any further german advances, and continuous german fire kept the advanced dutch units pinned down. We both tried to preserve our forces, unwiling to gamble with our troops, knowing that further casualties were going to be hard to replace. Thus the battle ended in a hard fought draw, with the germans still firmly in posession of the bridge, and the dutch clinging to their bunkers.

The recovery rolls in the post battle fase of the campaign allowed us to regain some lost infantry, and with the resupply points most casualties were replaced with new recruits. On both sides the mortars performed good and gained some hard earned xp, as did the german officer leading his men and the dutch politietroepen that retook the bunker. Next time the german's are going to assault the defences at Mill. 

Monday, 3 April 2017

28mm Dutch Marines Review

Yesterday a friend of mine brought in a few packs of May 40's new 28mm Dutch Marines. He picked them up for me at a local gameshow. I got a full squad of Marines(12), a set of three marine officers and a small separate three man Lewis team, aptly named the Rotterdam Team, for their poses where inspired by a locally famous painting of the Marines defending Rotterdam against the Germans.

Even though I have slightly to many projects going at the moment, I couldn't resist opening theblacks up. The Marine squad contains a mix of 12 different Marines in battledress and in long coats. One Lewis Gunner and a sergeant are included. The quality of the sculpts is very fine, and only a little flash. The detailing is excellent, the rifles have clearly sculpted bolts and even the anchors on the helmets are clearly visible. The quality of my tablet's camera don't do the models justice.

The size of the models is just a fraction larger than the warlord games plastics (even back than the Dutchie's were taller☺), but right on par with most metal ww2 ranges, and they blend in nicely on the battlefield with my BTD early war Germans and fallschirmjager. Because of May 40's attention to detail there really is only one flaw to find, and that is more of a personal taste: the helmets on a few of the models seem to sit somewhat high on their heads, which can look a bit funny to me at times. I'm really looking forward to painting these miniatures up, and fielding them in a few Rotterdam skirmishes against some of my disembarking German luftlande division.

Saturday, 18 February 2017

Battle of the bulge scenario 2

Today we started playing the scenarios from the bolt action supplement Battle of the Bulge. First up was the battle of Hurtgen Forest, with some veteran Americans trying to take down a German fortified position occupied by regular units. I took a veteran Sherman to accompany my three units of veterans supported by two Mmg's and a sniper.

The German left flank was heavily defended, so I chose to attack their right flank with the majority of my units. The scenario special rules gave the German some fortifications, minefields(the green patches) and ambush positions, and limited visibility in the heavily wooded and hilly forest.

A carefully placed German flamethrower team funneled my troops through a narrow corridor. Some bad dice rolls and -draws saw my gallant attack slowly grind down to a bloody halt, the Sherman destroyed and a desperate dash of my commanding officer proved futile. Even though the Germans suffered some serious casualties, the veteran gebirgsjager were firmly in control of the pillbox and trenches.

All in all we had a blast: the scenario was quite well ballanced and the special rules added some nice touches. Looking forward towards the next scenario!

Monday, 26 December 2016

28mm Dutch farm

Recently I purchased Sarissa's Dutch farm as a terrain piece for my early war Dutch and fallschirmjager to fight over. I'm pleasantly surprised by the kit. It's only the second lasered MDF kit I ever bought, but putting it together was rather easy, and the fit is excellent.

It consists out of a single ground floor, decided into two sections, two upper floors (no stairwell), and two roof sections. If you want great interior detailing you'll have to add some, but if like me, your main interest is a sectioned building suitable for bolt action, the structure is spot on. The size off the kit possitively surprised me, almost completely covering an A4 sheet.

After a quick fur brown spray painting was quick. Not entirely satisfied with the result though, so I'll add some more detailing later. The cardboard shutters fit reasonably well but don't paint up very good, I'd like to have seen them in MDF as well.

Wednesday, 18 November 2015

Early war german paratroopers

Some support paratroopers for bolt action and chain of command. Mainly engineers plus an antitank rifle and a light mortar.

Converted flame thrower from a radio operator. He should have a round gastank, but I'd like to imagine some creative paratroopers disguising the tank in something more innocent.

Thursday, 30 July 2015

German fallschirmjager for Bolt Action

Although I planned to paint a lot more during my holiday, I did manage to finish the first batch of my early war fallschirmjager. I've fudged the machine guns a bit, because I own only two mg34's, so the rest are mg42's. These fallschirmjager are to be used as enemies of my dutch reinforced platoon. Shown in the pictures are an officer, an air force liaison, a mmg and four squads of jager with an machine gun each.

Some engineers, a light artillery piece and a 37mm at gun are still in the mail, who together with some early war regular army troops whom I will use as the German 22nd airlanding division, will round out my German force for Fall Gelb battles.

Friday, 10 July 2015

Dutch ww2 Huzars

The Dutch army of 1940 had a few motorised regiments; the Huzaren motorrijders. Around my hometown they were mainly used to guard the motorways against enemy airborne forces and insurgents. The dutch armoured car platoons were also supported by the huzars. Thus they helped defend airfield Ypenburg against the attacking fallschirmjager.

For my Bolt Action force I converted a BA10 into something not entirely unlike a Landsverk M 36, and converted some Warlord games German motorbikes into huzars, by means of a simple headswap. The huzars wore brown leather motorjackets and pants, coupled with dark cavalry boots ( and spurs according to some!).

Thursday, 9 July 2015

Painting and basing spree

At the beginning of this year I had quite a long list of miniaturen to paint. Than life happened and only a handful got painted. The next few weeks are my holidays, and since the DIY tasks are postponed due to the builders finishing late, I have some time on my hands. Apparently I'm very good at starting projects but not at seeing them through ( it seems to me most wargamers share that ). So I've gathered some of the last remnants of armies almost finished. Below you can see them in all their unfinished glory:

- catachans (marbo, an ogryn stand-in for Not Deddog, and some snipers/ troopers)
- Russians ( scouts, an mmg, light mortar, commisar, spotter And officer)
- Germans ( mid/late war troops, panzerschreck and flamethrower plus a group of early war fallschirmjager)
- dwarfs ( anvil, lord, scouts, converted irondrakes and a unit of slayers)
- dutch ww2 Huzars on motorcycles

Hopefully I can start posting pictures of them finished or at least progressing through the next few weeks. Some of the miniatures only need basing, others haven't even received their basecoat yet.

Friday, 12 June 2015

Dutch support units 28mm

The first series of pictures of my 28mm dutch ww2 force. Since no company manufactures these units I've had to convert them.

The Landsverk M36 armoured car is based of a 1/48 Russian BA-10. I got that idea out of the flames of war dutch guide, but it seems to work better in 15mm than 28mm, the details are just to recognizable. Both the conversion as well as the paint job could do with some improvement, but for now it will do

The artillery is a piece of veld-7, converted from another 75mm Krupp gun. Since Outpost manufactures only one officer, I used some small conversions. On the artillery sergeant I just replaced the hand, having him ready for the fire order.

The last picture is an 45mm light at-gun. Luckily the Italian army used the same gun and had putties as part of their uniform. A simple headswap on the warlord games set (courtesy of their flexible head system) has them ready for action.

Wednesday, 10 June 2015

28mm Dutch ww2 army for may 1940

The last few months I've been working on a few different projects, and didn't get around to posting anything. The main project are two armies for 28mm ww2: Dutch and German Fallschirmjager. Since nobody manufactures 28mm ww2 Dutch, I had to mix and match different models from various manufacturers. The infantry is mostly Outpost Wargame Service's ( excellent service in providing a specific selection of models I could use) range of rumanians, who happened to use the same helmet and almost the same uniform. I sculped the webbing on (first sculpting project ever, the result will have to do), and ordered Lewis guns from another company. 

The weird green-blue-grey color of the dutch uniform was difficult to replicate, and I'm not entirely pleased with the result, but it's passable for tabletop encounters. I'll try and take some snapshots of the different units and post them soon, including my converted "not entirely unlike a Landsverk" M38 armoured car and my small but proud squad of motorbike mounted Hussars.